3 Ways to Target Your Ideal Audience via Facebook Ads

Welcome to Facebook, a marketer’s paradise for finding your ideal audience!
Facebook has created a space for sharing. Users willingly hand over personal details daily. This includes major life events (babies, weddings, moves, job changes), family and relationship status, location, likes, demographics, and more.
This means there is a wealth of information about Facebook users, and it’s all available for advertisers to use.
Compared to other paid media, Facebook ads comes with a significant advantage: the ability to target your ideal audience and show them hyper-relevant ads.
The key is knowing who to target.
Without utilizing targeting, you might as well slap a billboard up on the highway. You’ll get the same amount of traffic. Neither audience will be qualified.
Mastering targeting means having the ability to reach a more qualified cold audience at any time.
In a previous post, we talked about the importance of creating and nurturing a warm, ideal audience. It’s true, warm audiences typically convert at a lower cost.
But knowing how to target a cold audience means you’re always able to keep your funnel full by turning a cold audience into warm, and warm into red hot buyers.
Today’s post is about creating these cold audiences inside your Facebook Ad account.
We’ll discuss 3 options for building a targeted, cold audience.
Ideal Audience Type 1: Lookalikes
If you’re already in business and you have sold your product or service, creating this first cold audience is easy.
All you’ll need is a list of email addresses for your current and past customers or clients.
An existing buyers list is the hottest list you have (they’ve already bought)! Essentially, we want to “clone” this list and create more people who are willing and able to purchase.
To do this, we need to head into Power Editor.
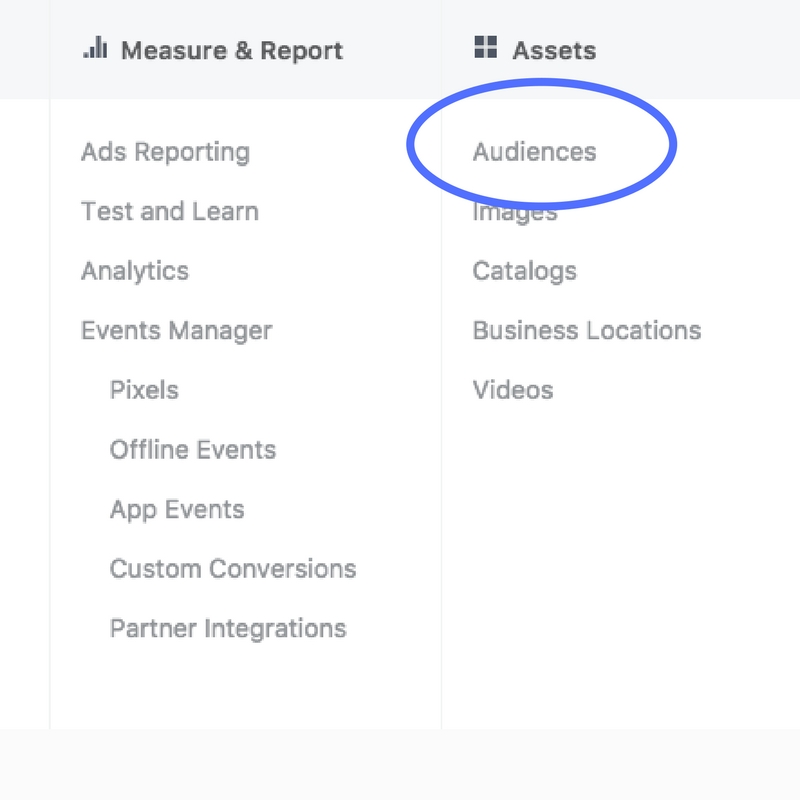
Jump up to the top menu. You’ll click to reveal a dropdown menu. Inside, find “Audiences.”
There, you’ll see a big blue button prompting you to “Create Audience.”
That button will give you some options for creating different types of ideal audiences. For this step, choose to create a custom audience.
Then, choose Customer File.
Here’s where you can upload your list of buyers. Make sure to name your audience something that makes sense to you so you know which list this is. Choose something like, “Buyers - Jan 2018.”
Now that you have your list of buyers ready to go, it’s time to create the lookalike ideal audience.
Head back into Audiences and select “Create Audience.”
This time, choose to create a lookalike audience.
Here’s what you’ll see.
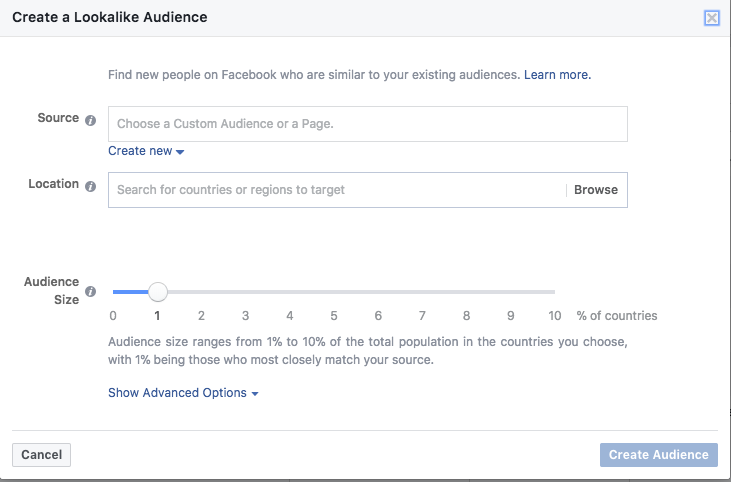
If you click on “Source,” you’ll see options drop down. Find the audience that you just uploaded and select it.
This will now become the “source” for creating an entire ideal audience of Facebook users who are similar to your buyers.
You can now narrow by location and select the percentage of a population that you’d like to match. We tend to keep it at 1% (where 1% is most similar to your buyers list and 10% is least similar).
Give your ideal audience a name that makes sense to you, something like “Buyers Jan 2018 - Lookalike.”
If you’d like, you can repeat this process with other audiences such as your email list.
Ideal Audience Type 2: The Interest Bundle
When we work with a client, we take into account a few factors:
- The geographical area the client serves (don’t target Asia if you only ship to North America, for example).
- The client’s avatar (who the client intends to attract).
- The client’s actual buyers (who the client actually attracts).
Using these factors, we create a set of rules that Facebook uses to target users who have the highest chance of converting into paying customers.
Before we get started, make sure you’ve created a list of your current and past buyers and named that audience. See above for details if you haven’t done that yet.
Next, head into “Audience Insights.”
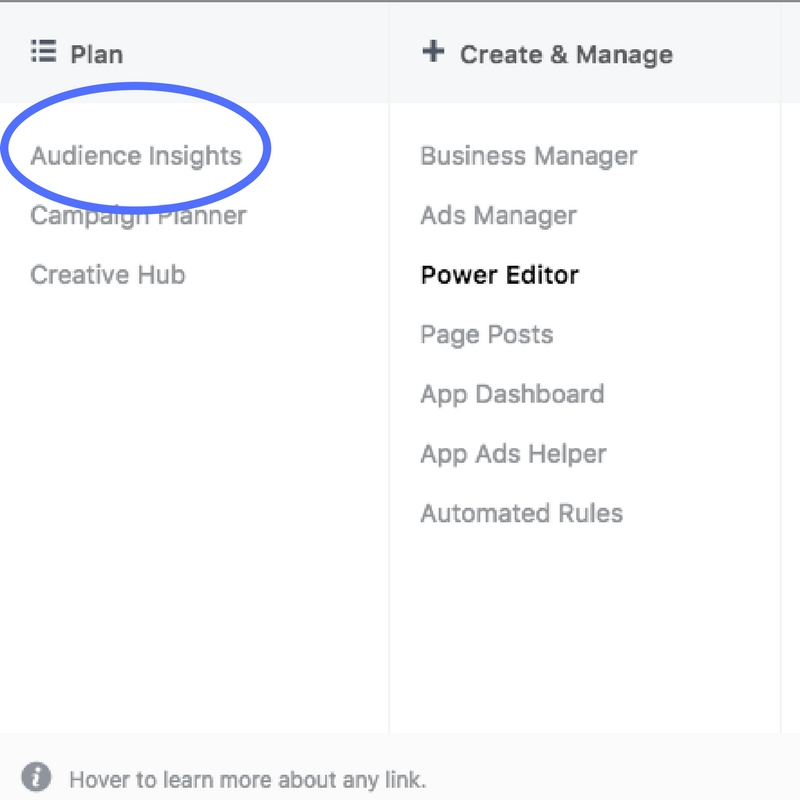
Here, you’ll find information on all Facebook users!
It’s also a good place to find out who is connected to your page, and who makes up your saved and custom ideal audiences.
When you jump in, Facebook will immediately ask who you’re interested in learning about. For this case, select, “A Custom Audience.”
The screen will prompt you to add your custom audience. Choose the buyers list (it should be saved already if you’ve uploaded it).
Now, you can see insights into this audience.
Explore a little to find out the age, gender, location, household status, other page likes, the devices they use, and other information.
Some clients are surprised to see who their actual audience is. It isn’t always who a business intends to attract!
Take note on the composition of this ideal audience. This will be the basis of our interest bundle.
*Note: If you don’t have a buyer list to look at, just use the information about who you think your ideal customers are. It’s ok to start here. You can always modify as you collect more data.
Either way, it’s time to grab your notes and head back over to “Audiences.”
Again, select “Create Audience.”
This time, choose “Saved Audience.” Use your notes to create an audience of your choosing. Consider targeting age, gender, location, and other interests that your buyers have in common.
Ideal Audience Type 3: Video Views
If you’ve run ads for any length of time, you may already have a group of people who have seen videos from your page.
This is a great place to pull both warm and cold audiences from.
We consider a “warm” audience a user who has watched a larger percentage of a video, usually 50% - 75%.
However, Facebook also tracks users who’ve only watched 3 or 10 seconds. We consider these cold audiences because they probably haven’t watched enough of the video to know, like, or trust your brand at this point.
Here’s how to create your cold video view audience.
Again, jump into “Audiences,” like before.
Now, when you create a new audience, choose to create a custom audience again.
Choose to create an audience based on engagement, and then select Video as the type of engagement.
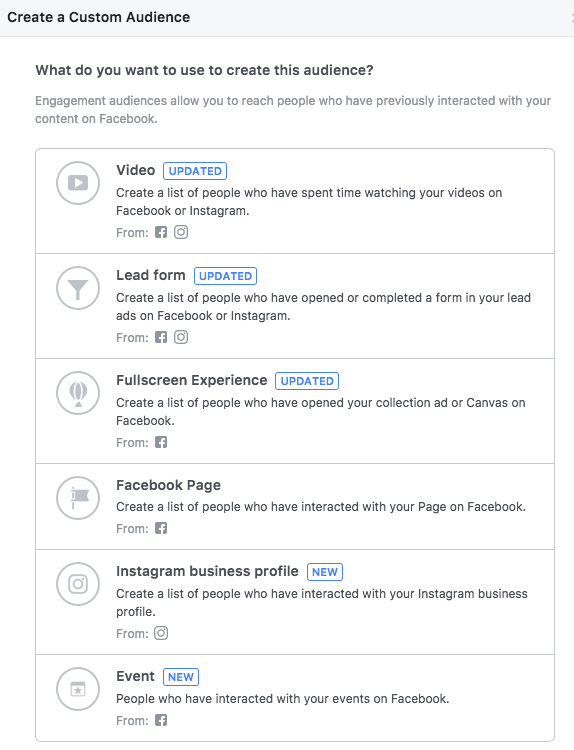
Now, you get to choose the videos to add to the list. Whichever videos you choose, Facebook will create an audience of people who watch part of that video. You get to decide how much they need to watch to be added to your cold audience.
Follow the prompts and answer the questions to complete the audience set up.
That’s it! These audiences are all ready to use inside your campaigns.
Now that you have 3 cold audiences to target, you can continue to add people to your funnel and move them closer to a conversion!
In the meantime, why not find out what the “7 biggest mistakes you’re making with your Facebook Ads are”, and how to fix them: